

Troubleshooting
This document shows common issues and solutions to any problems a user can meet.
Installation
Section titled “Installation”filesystem `btrfs’ doesn’t support blocklists
Section titled “filesystem `btrfs’ doesn’t support blocklists”The error during the installation:
grub-install: warning: this GPT partition label contains no BIOS Boot Partition; embedding won't be possible.grub-install: error: filesystem `btrfs' doesn't support blocklists.is caused when the partition table is GPT and you are not using EFI boot mode. If you would like to use GPT, remember to use EFI instead of BIOS/Legacy mode.
time warp or clock problem
Section titled “time warp or clock problem”During the installation of Athena, if you get an error like:
gpg: key <keyid> was created 3474 seconds in the future (time warp or clock problem)it can occur when you are installing Athena OS by an ISO that has been released just now. To solve the issue, just wait 30 minutes and boot again by the ISO.
The cause of the issue is due to a key in /etc/pacman.d/gnupg that has been generated in a Live Environment that has a different time of the running installer. Since in Live Environment the time changes and fixes to the right time after some minutes, if this change is done during the running of pacman-key --init, it causes that error. For example, the Live Environment shows 18:40 and during the install, it switches to 19:40, so the running installer, if creates new key by pacman-key --init when the time of Live Environment is switched, it cause the error. If you get this error, boot on Live Environment and, before to run the installer, wait for some minutes that the time clock fixes automatically.
Nix install process killed
Section titled “Nix install process killed”If Athena Nix installation is killed and the following error is produced:
[ INFO ] 17:45:48 /nix/store/2ig2gxwx3xzavg43s6x17ym520la6d5w-nixos-install-tools-24.05pre604424.d8fe5e6c92d0/bin/nixos-install: line 178:  6209 Killed                  nix-build --out-link "$outLink" --store "$mountPoint" "${extraBuildFlags[@]}" --extra-substituters "$sub" '<nixpkgs/nixos>' -A system -I "nixos-config=$NIXOS_CONFIG" "${verbosity[@]}"
[ INFO ] 17:45:49 Installation log file copied to /var/log/aegis.log[ INFO ] 17:45:49 create /mnt/var/log[ INFO ] 17:45:49 Copy /tmp/aegis.log to /mnt/var/log/aegis.log[ INFO ] 17:45:49 unmount command processed on /mnt/home[ INFO ] 17:45:50 unmount command processed on /mnt[ ERROR ] 17:45:50 Installation failed. Exit code: 137
just assign more resources (CPU, RAM, Swap space) to your system.
memtest86+: /mnt/boot/memtest86+/memtest.bin exists in filesystem
Section titled “memtest86+: /mnt/boot/memtest86+/memtest.bin exists in filesystem”If the installation interrupts due to the following errors:
[ INFO ] 16:54:32 checking keyring...[ INFO ] 16:54:32 checking package integrity...[ INFO ] 16:55:04 loading package files...[ INFO ] 16:55:05 checking for file conflicts...[ INFO ] 16:55:07 error: failed to commit transaction (conflicting files)[ INFO ] 16:55:07 memtest86+: /mnt/boot/memtest86+/memtest.bin exists in filesystem[ INFO ] 16:55:07 athena-grub-theme: /mnt/boot/grub/themes/athena/background.png exists in filesystem[ INFO ] 16:55:07 athena-grub-theme: /mnt/boot/grub/themes/athena/boot_menu_c.png exists in filesystem[ INFO ] 16:55:07 athena-grub-theme: /mnt/boot/grub/themes/athena/boot_menu_e.png exists in filesystem[ INFO ] 16:55:07 athena-grub-theme: /mnt/boot/grub/themes/athena/boot_menu_n.png exists in filesystem[ INFO ] 16:55:07 athena-grub-theme: /mnt/boot/grub/themes/athena/boot_menu_ne.png exists in filesystem[ INFO ] 16:55:07 athena-grub-theme: /mnt/boot/grub/themes/athena/boot_menu_nw.png exists in filesystem[ INFO ] 16:55:07 athena-grub-theme: /mnt/boot/grub/themes/athena/boot_menu_s.png exists in filesystem[ INFO ] 16:55:07 athena-grub-theme: /mnt/boot/grub/themes/athena/boot_menu_se.png exists in filesystem[ INFO ] 16:55:07 athena-grub-theme: /mnt/boot/grub/themes/athena/boot_menu_sw.png exists in filesystem[ INFO ] 16:55:07 athena-grub-theme: /mnt/boot/grub/themes/athena/boot_menu_w.png exists in filesystem[ INFO ] 16:55:07 athena-grub-theme: /mnt/boot/grub/themes/athena/hackb_18.pf2 exists in filesystem[ INFO ] 16:55:07 athena-grub-theme: /mnt/boot/grub/themes/athena/icons/athena.png exists in filesystem[ INFO ] 16:55:07 athena-grub-theme: /mnt/boot/grub/themes/athena/menu_bkg_c.png exists in filesystem[ INFO ] 16:55:07 athena-grub-theme: /mnt/boot/grub/themes/athena/menu_bkg_e.png exists in filesystem[ INFO ] 16:55:07 athena-grub-theme: /mnt/boot/grub/themes/athena/menu_bkg_n.png exists in filesystem[ INFO ] 16:55:07 athena-grub-theme: /mnt/boot/grub/themes/athena/menu_bkg_ne.png exists in filesystem[ INFO ] 16:55:07 athena-grub-theme: /mnt/boot/grub/themes/athena/menu_bkg_nw.png exists in filesystem[ INFO ] 16:55:07 athena-grub-theme: /mnt/boot/grub/themes/athena/menu_bkg_s.png exists in filesystem[ INFO ] 16:55:07 athena-grub-theme: /mnt/boot/grub/themes/athena/menu_bkg_se.png exists in filesystem[ INFO ] 16:55:07 athena-grub-theme: /mnt/boot/grub/themes/athena/menu_bkg_sw.png exists in filesystem[ INFO ] 16:55:07 athena-grub-theme: /mnt/boot/grub/themes/athena/menu_bkg_w.png exists in filesystem[ INFO ] 16:55:07 athena-grub-theme: /mnt/boot/grub/themes/athena/norwester_16.pf2 exists in filesystem[ INFO ] 16:55:07 athena-grub-theme: /mnt/boot/grub/themes/athena/norwester_20.pf2 exists in filesystem[ INFO ] 16:55:07 athena-grub-theme: /mnt/boot/grub/themes/athena/norwester_22.pf2 exists in filesystem[ INFO ] 16:55:07 athena-grub-theme: /mnt/boot/grub/themes/athena/progress_bar_c.png exists in filesystem[ INFO ] 16:55:07 athena-grub-theme: /mnt/boot/grub/themes/athena/progress_bar_e.png exists in filesystem[ INFO ] 16:55:07 athena-grub-theme: /mnt/boot/grub/themes/athena/progress_bar_w.png exists in filesystem[ INFO ] 16:55:07 athena-grub-theme: /mnt/boot/grub/themes/athena/progress_highlight_c.png exists in filesystem[ INFO ] 16:55:07 athena-grub-theme: /mnt/boot/grub/themes/athena/select_c.png exists in filesystem[ INFO ] 16:55:07 athena-grub-theme: /mnt/boot/grub/themes/athena/select_e.png exists in filesystem[ INFO ] 16:55:07 athena-grub-theme: /mnt/boot/grub/themes/athena/select_w.png exists in filesystem[ INFO ] 16:55:07 athena-grub-theme: /mnt/boot/grub/themes/athena/slider_c.png exists in filesystem[ INFO ] 16:55:07 athena-grub-theme: /mnt/boot/grub/themes/athena/slider_n.png exists in filesystem[ INFO ] 16:55:07 athena-grub-theme: /mnt/boot/grub/themes/athena/slider_s.png exists in filesystem[ INFO ] 16:55:07 athena-grub-theme: /mnt/boot/grub/themes/athena/theme.txt exists in filesystem[ INFO ] 16:55:07 intel-ucode: /mnt/boot/intel-ucode.img exists in filesystem[ INFO ] 16:55:07 Errors occurred, no packages were upgraded.[ INFO ] 16:55:07 ==> ERROR: Failed to install packages to new rootprobably you are using a non-empty boot partition that contains memtest.bin as in Athena, probably from another Linux distro installation. To fix this, format this boot partition or select a new partition to be used as Athena boot partition.
Disks not detected
Section titled “Disks not detected”In case the system does not recognize your disk, even if you are using GParted or fdisk -l command, the cause could be that the disk is set to RAID. You must change it to AHCI.
Login freeze at ISO Live boot
Section titled “Login freeze at ISO Live boot”By running ISO, at boot, if login prompt freezes, reboot and select the boot entry called “Athena OS install medium (%ARCH%, UEFI, safe graphics, nomodeset)”. The problem was caused by nouveau.modeset=1 for some specific NVIDIA hardware.
Error: file ‘/vmlinuz-linux-lts’ not found
Section titled “Error: file ‘/vmlinuz-linux-lts’ not found”If, after a system update, you get the following error at boot:

it is probably caused by a wrong update of the Linux kernel or the boot partition was not correctly mounted during this process, or due to an interruption (freeze, reboot or shutdown) during the upgrade of the system (in particular, during the generation of the image at kernel upgrade process time).
To fix it, boot in a Live Environment by Athena ISO, open the terminal and run the following commands:
sudo mount -o subvol=@ /dev/<root-partition-device> /mntsudo mount /dev/<root-partition-device> /mntMount the boot filesystem:
sudo mount /dev/<boot-partition-device> /mnt/bootChroot inside the mounted root partition by:
sudo arch-chroot /mnt/Finally, run:
sudo pacman -Syyusudo pacman -S linux-lts linux-lts-headersexitIf needed, persist that /boot partition in your fstab with a persistent identifier so that you won’t have to unnecessarily do this again the next time the kernel updates.
At the end, remove the ISO file and reboot the system.
Error 24 : Write error : cannot write compressed block
Section titled “Error 24 : Write error : cannot write compressed block”During the installation, if you get the following error messages:
Error 24 : Write error : cannot write compressed blockbsdtar: Write erroryour boot partition is full and cannot write the initcpio image of the system. At reboot after the installation, you could still access to the installed OS by the EFI default loader entry, but on the desktop, you could get a low space on boot partition message.
To solve this, you need to reboot and land again the the Live ISO environment. Let’s guess the boot partition is /dev/nvme0n1p1. Open a terminal and mount it:
sudo mount /dev/nvme0n1p1 /mnt/replace /dev/nvme0n1p1 by your actual boot partition block device.
Now, list the files and folders inside the boot partition:
tree /mntand identify which files and folders are old and unused, and remove them.
For example, you should remove GRUB files related to old Linux systems that are not installed anymore on your computer.
Once reboot, access to your BIOS and be sure that GRUB entry has the highest priority on UEFI Boot Priority section.
Finally, in case Windows entry disappeared, land on the installed Athena system, open a terminal and run:
sudo grub-mkconfig -o /boot/grub/grub.cfgRestore GRUB
Section titled “Restore GRUB”For fixing the GRUB, before exiting from the Live Environment, before proceeding, you must detect the existing Linux partition and the EFI partition containing the GRUB entries for Linux and Windows (or other OS). You can do that by running sudo fdisk -l.
Let’s guess the existing Linux partition is /dev/sda3 and the boot efi partition is at /dev/nvme0n1p1.
If your existing Linux distribution is based on BTRFS file system, run:
sudo mount -o subvol=@ /dev/sda3 /mntsudo mount -o subvol=@home /dev/sda3 /mnt/homesudo mount -o subvol=@log /dev/sda3 /mnt/var/logotherwise run:
sudo mount /dev/sda3 /mntsudo mount /dev/sda3 /mnt/homesudo mount /dev/sda3 /mnt/var/logThen, run:
mkdir /tmp/intermediatesudo mount /dev/nvme0n1p1 /tmp/intermediateIf EFI boot, run:
sudo mount --bind /tmp/intermediate /mnt/efi/If GRUB BIOS/Legacy boot:
sudo mount --bind /tmp/intermediate /mnt/boot/Finally:
sudo arch-chroot /mntNow, check the directory tree in /efi folder and you should have only these files/directories:
'$RECYCLE.BIN' EFI 'System Volume Information'Check the EFIdirectory and be sure that there are not nested further EFI directories otherwise your GRUB never work. You must have only the current EFI directory with the following files/directories:
Boot MicrosoftIf you see also another EFI directory or other ones containing the file grubx64.efi (i.e., GRUB directory), delete these folders. Note that in other distros, GRUB folder could have a different name. Don’t worry to delete GRUBfolder by:
rm -rf /efi/EFI/GRUBThe next command will create it again.
Then, if EFI boot, run:
grub-install --target=x86_64-efi --efi-directory=/boot --bootloader-id=GRUBIf GRUB BIOS/Legacy boot:
grub-install --force --target=i386-pc --recheck --boot-directory=/boot /dev/nvme0n1Note that, /dev/nvme0n1 must be the disk containing the boot partition, not the boot partition itself.
Finally, for fixing also the Linux access, burn Athena OS ISO on a USB and follow the steps explained at Post-installation section.
Several boot entries have been disappeared
Section titled “Several boot entries have been disappeared”In case you are in dual boot and some entries are not shown anymore (i.e., Windows Boot Manager if you have Windows in dual boot), enter in Athena OS and run:
sudo grub-mkconfig -o /boot/grub/grub.cfgThen reboot.
ERROR kdfontop.c:183 put_font_kdfontop: Unable to load such font with such kernel version
Section titled “ERROR kdfontop.c:183 put_font_kdfontop: Unable to load such font with such kernel version”The message:
setfont: ERROR kdfontop.c:183 put_font_kdfontop: Unable to load such font with such kernel versioncan be fixed by disabling the deferred takeover by adding fbcon=nodefer as kernel parameter in the GRUB_CMDLINE_LINUX_DEFAULT variable of /etc/default/grub file.
Reference: #99
Blinking cursor after boot
Section titled “Blinking cursor after boot”After an upgrade of your system, when you boot, after the GRUB choice, if you get only a blinking cursor, the issue could be related to the upgrade of some components that could break your system boot. To solve this issue, mount an Athena ISO to your computer to enter in a Live Environment, mount to /mnt the partition where your original system was installed and run:
sudo arch-chroot /mntAfter that, downgrade the affected components, for example you can try with the kernel. Remove the existing kernel and kernel headers packages and install:
pacman -Rnsd --nodeps <yourkernel> <yourkernel>-headerspacman -S linux-lts linux-lts-headersIf you boot, and you are able to get some output log strings and you reach another different blinking cursor, press CTRL+ALT+Fx (where x can be 2, 3, 4, and so on) to perform more troubleshooting.
Black screen on VMware after reboot
Section titled “Black screen on VMware after reboot”After reboot, if you get black screen, and you are able to get the TTY, you can check for an error by running:
journalctl -b -p 3If you see an error related to the VMware driver, install xf86-video-vesa and xf86-video-fbdev packages and reboot.
Desktop Environments
Section titled “Desktop Environments”KDE Plasma
Section titled “KDE Plasma”After login, if you get a black screen and nothing happens, probably the cause is gnome-shell. Just get TTY by CTRL+ALT+F3 or another Fn button on your keyboard, and remove gnome-shell package.
If the issue persists, install Xorg server packages (i.e., xorg-x11-drv-libinput, xorg-x11-server-Xorg, xorg-x11-server-Xwayland). After this, reboot and at login, if you cannot reach the GUI, access to the system by TTY and search for logs in ~/.xsession-errors.
Display Managers
Section titled “Display Managers”GDM: login background turned to grey
Section titled “GDM: login background turned to grey”It should be caused by an update of GDM or GNOME packages that restored the default gresource theme file. To restore the Athena GDM theme, run:
sudo pacman -S athena-gdm-configBloodhound
Section titled “Bloodhound”On Bloodhound, when neo4j database is run by sudo neo4j console, we can get some errors like:
Exception in thread "main" java.lang.LinkageError: Cannot to link java.nio.DirectByteBufferFor solving it, just run neo4j server by systemctl start neo4j. You can check the proof that the server is correctly running by systemctl status neo4j.
conda activate continues to show the prompt (base) instead of (test).
The issue is related to the usage of no-repeat-flag in .bashrc. To solve this, add the following code inside .bashrc:
if [[ $1 != no-repeat-flag ]]; then __conda_setup="$('/home/kumquat/miniconda3/bin/conda' 'shell.bash' 'hook' 2> /dev/null)" if [ $? -eq 0 ]; then eval "$__conda_setup" else if [ -f "/home/kumquat/miniconda3/etc/profile.d/conda.sh" ]; then . "/home/kumquat/miniconda3/etc/profile.d/conda.sh" else export PATH="/home/kumquat/miniconda3/bin:$PATH" fi fi unset __conda_setupfi# <<< conda initialize <<<conda activate $CONDA_DEFAULT_ENVWin-Kex ESM Mode ‘cannot execute: required file not found’
Section titled “Win-Kex ESM Mode ‘cannot execute: required file not found’”This issue affects both Athena OS and Kali Linux. When you run kex --esm and you get:
/usr/bin/kex: line 389: /mnt/c/Windows/system32/cmdkey.exe: cannot execute: required file not found/usr/bin/kex: line 490: /mnt/c/Windows/system32/mstsc.exe: cannot execute: required file not foundit could be due to two reasons:
- wine is installed
- you are running Athena OS and Kali Linux WSL together
Uninstall wine package, close both the WSL sessions, open CMD in Windows and run wsl --shutdown. Run Athena OS and you should not get this error anymore.
Win-Kex ESM Mode ‘Remote Desktop can’t connect’
Section titled “Win-Kex ESM Mode ‘Remote Desktop can’t connect’”In case you get the following error:
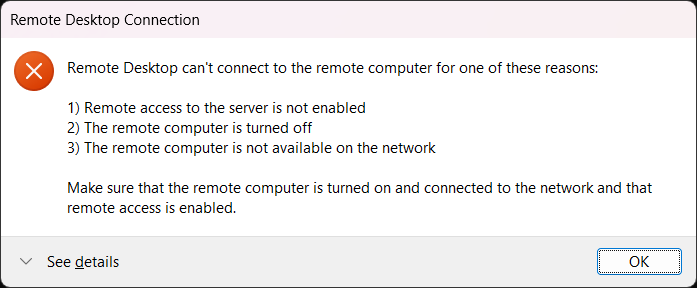
just open a new Windows terminal and run:
wsl --shutdownThen, reopen Athena OS WSL and try to run again:
kex --esm --ip -sError: unable to open display :0
Section titled “Error: unable to open display :0”When installing software like mesa-utils, when running a GUI application, you could get the following error:
Error: unable to open display :0To solve it, just shutdown WSL by:
sudo shutdown nowThe terminal will close, wait for some seconds and rerun Athena WSL again.
Maximum file size exceeded
Section titled “Maximum file size exceeded”When you install or upgrade packages, if you get the following error:
error: failed retrieving file 'package-name.pkg.tar.zst' from hub.athenaos.org : Maximum file size exceededprobably the Athena repository database was not updated correctly at server side during the building of the package. In this case, contact Athena Team. They should trigger the update of the Athena repository database.
After that, run:
sudo pacman -Syyand try again to install or upgrade your packages.
Visual glitch
Section titled “Visual glitch”If you are experiencing virtual glitches like:
and you are working in a virtual machine, the issue could be caused by a bug on the VM graphic adapter. Just disable 3D Acceleration and glitches should be fixed.
Intermittent freezing in VM
Section titled “Intermittent freezing in VM”If you are experiencing an intermittent freezing on your environment, and you are working in a virtual machine, the issue could be caused by a bug on the VM graphic adapter. Just disable 3D Acceleration and the freezing should be fixed.
Browser elements overlap
Section titled “Browser elements overlap”In case it occurs that browser elements can overlap as the following case:

The reason is that the website is using the Athena OS system font instead of using its one.
In case you would like to solve this behavior on the system side, you need to delete the entry font-name='JetBrains Mono 11' set in /org/gnome/desktop/ or changing its font.
You can remove it or change the font by:
dconf dump /org/gnome/desktop/ > fix.txtEdit fix.txt and delete the line containing font-name='JetBrains Mono 11' or replace this font name with your preferred, save and close the file, then run:
dconf reset -f /org/gnome/desktop/cat fix.txt | dconf load /org/gnome/desktop/In case your theme will be reset, just run:
athena-theme-tweak -t <name of your favourite theme>Use athena-theme-tweak -l to get the list of themes to be chosen.
Restore system by snapshots in GRUB
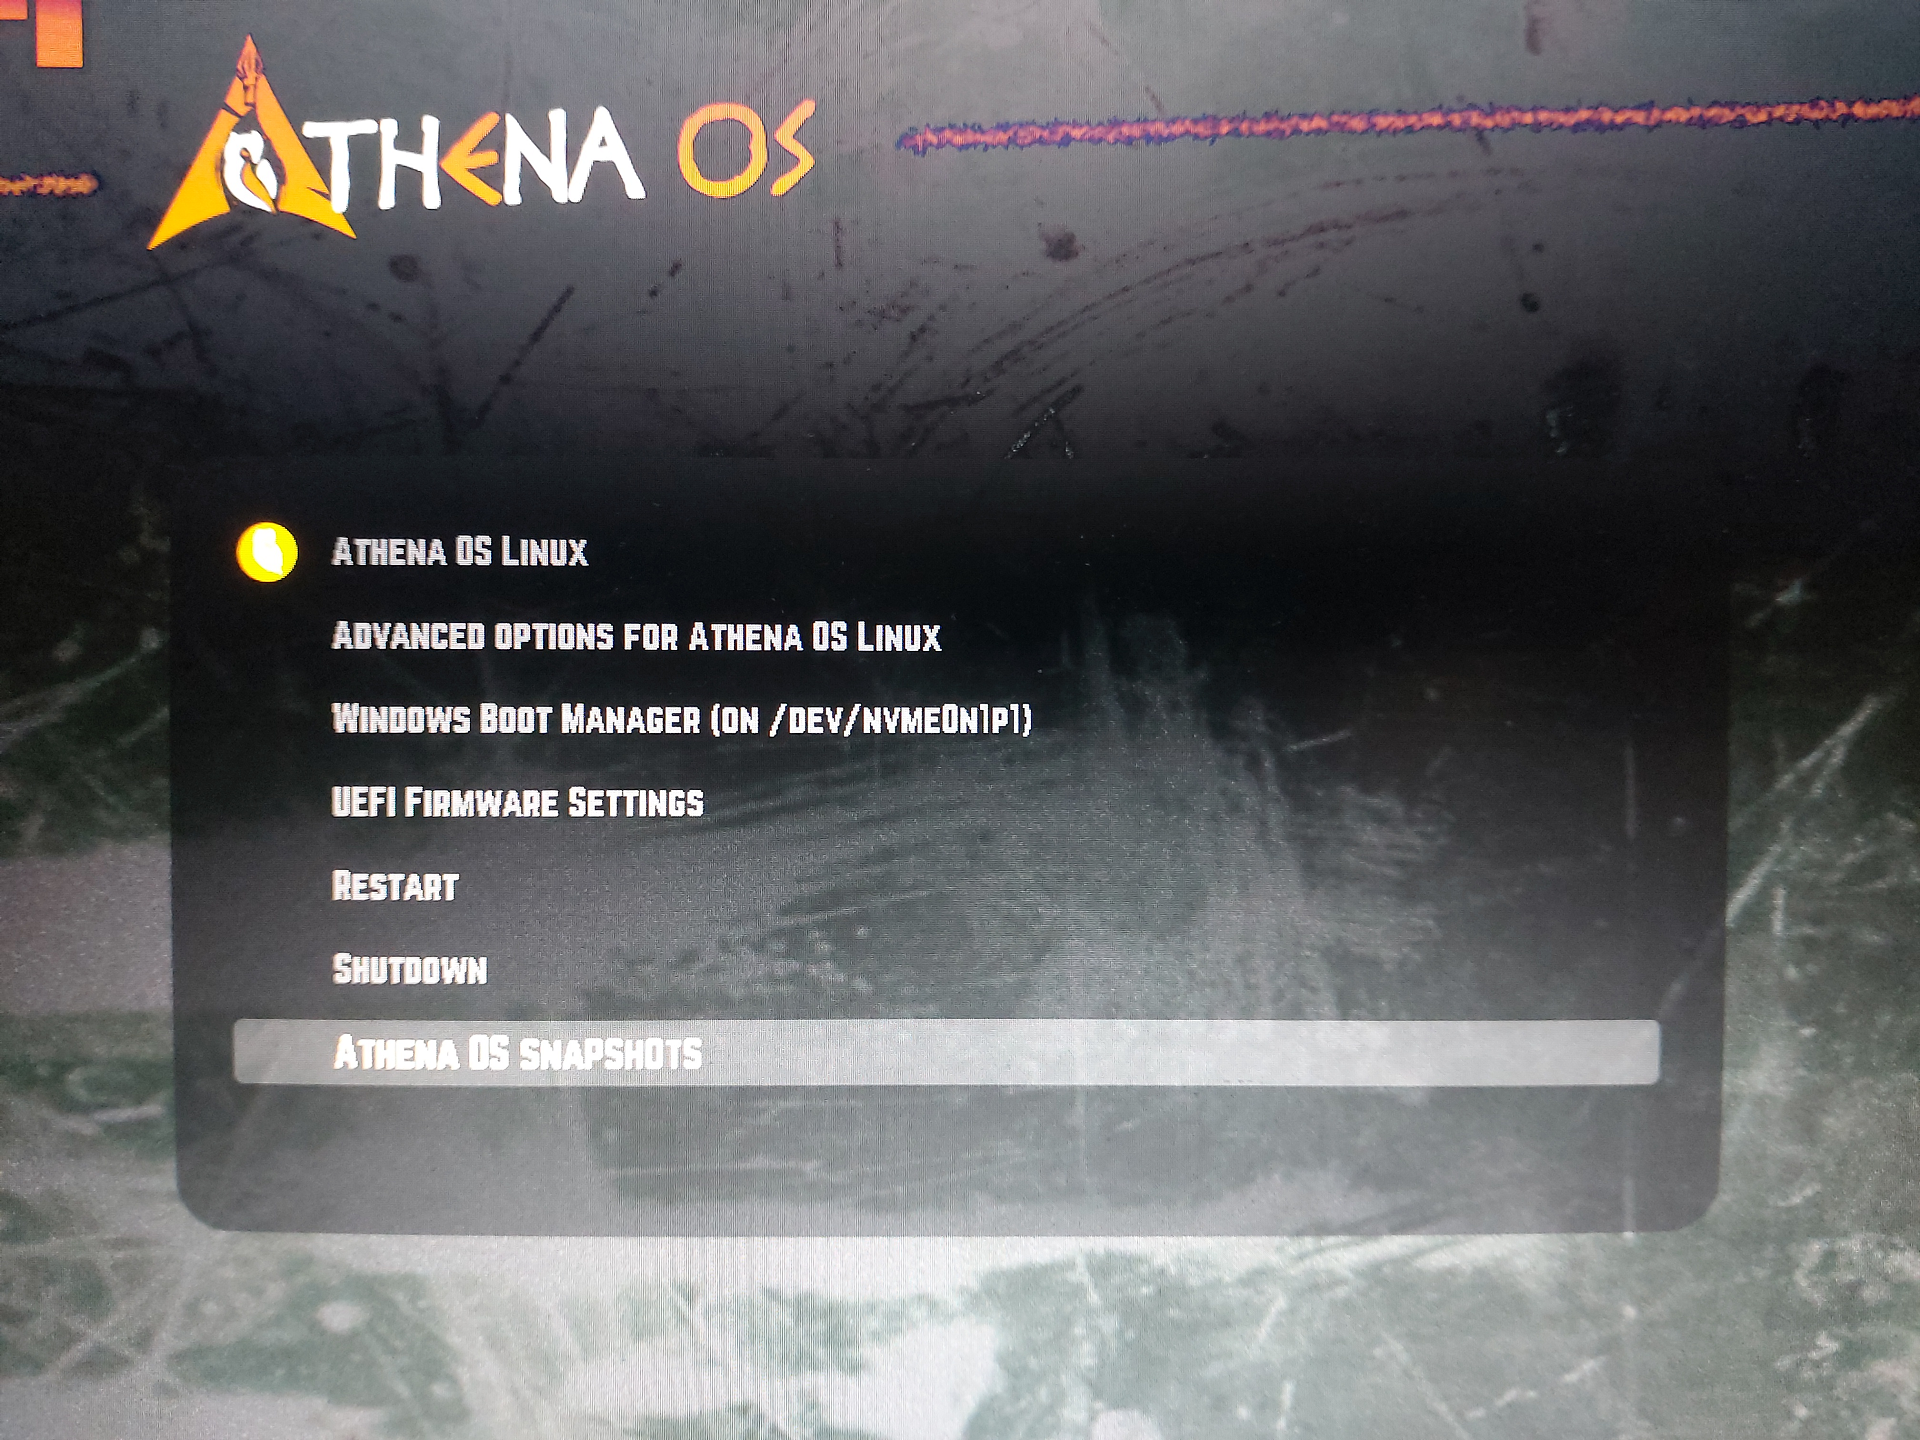
Section titled “Restore system by snapshots in GRUB”In case you are not able to get in the system due to a broken upgrade or similar events, you can leverage on Grub BTRFS snapshots in order to restore a previous state of your system. To do this, run the system, on the GRUB select Athena OS Snapshots
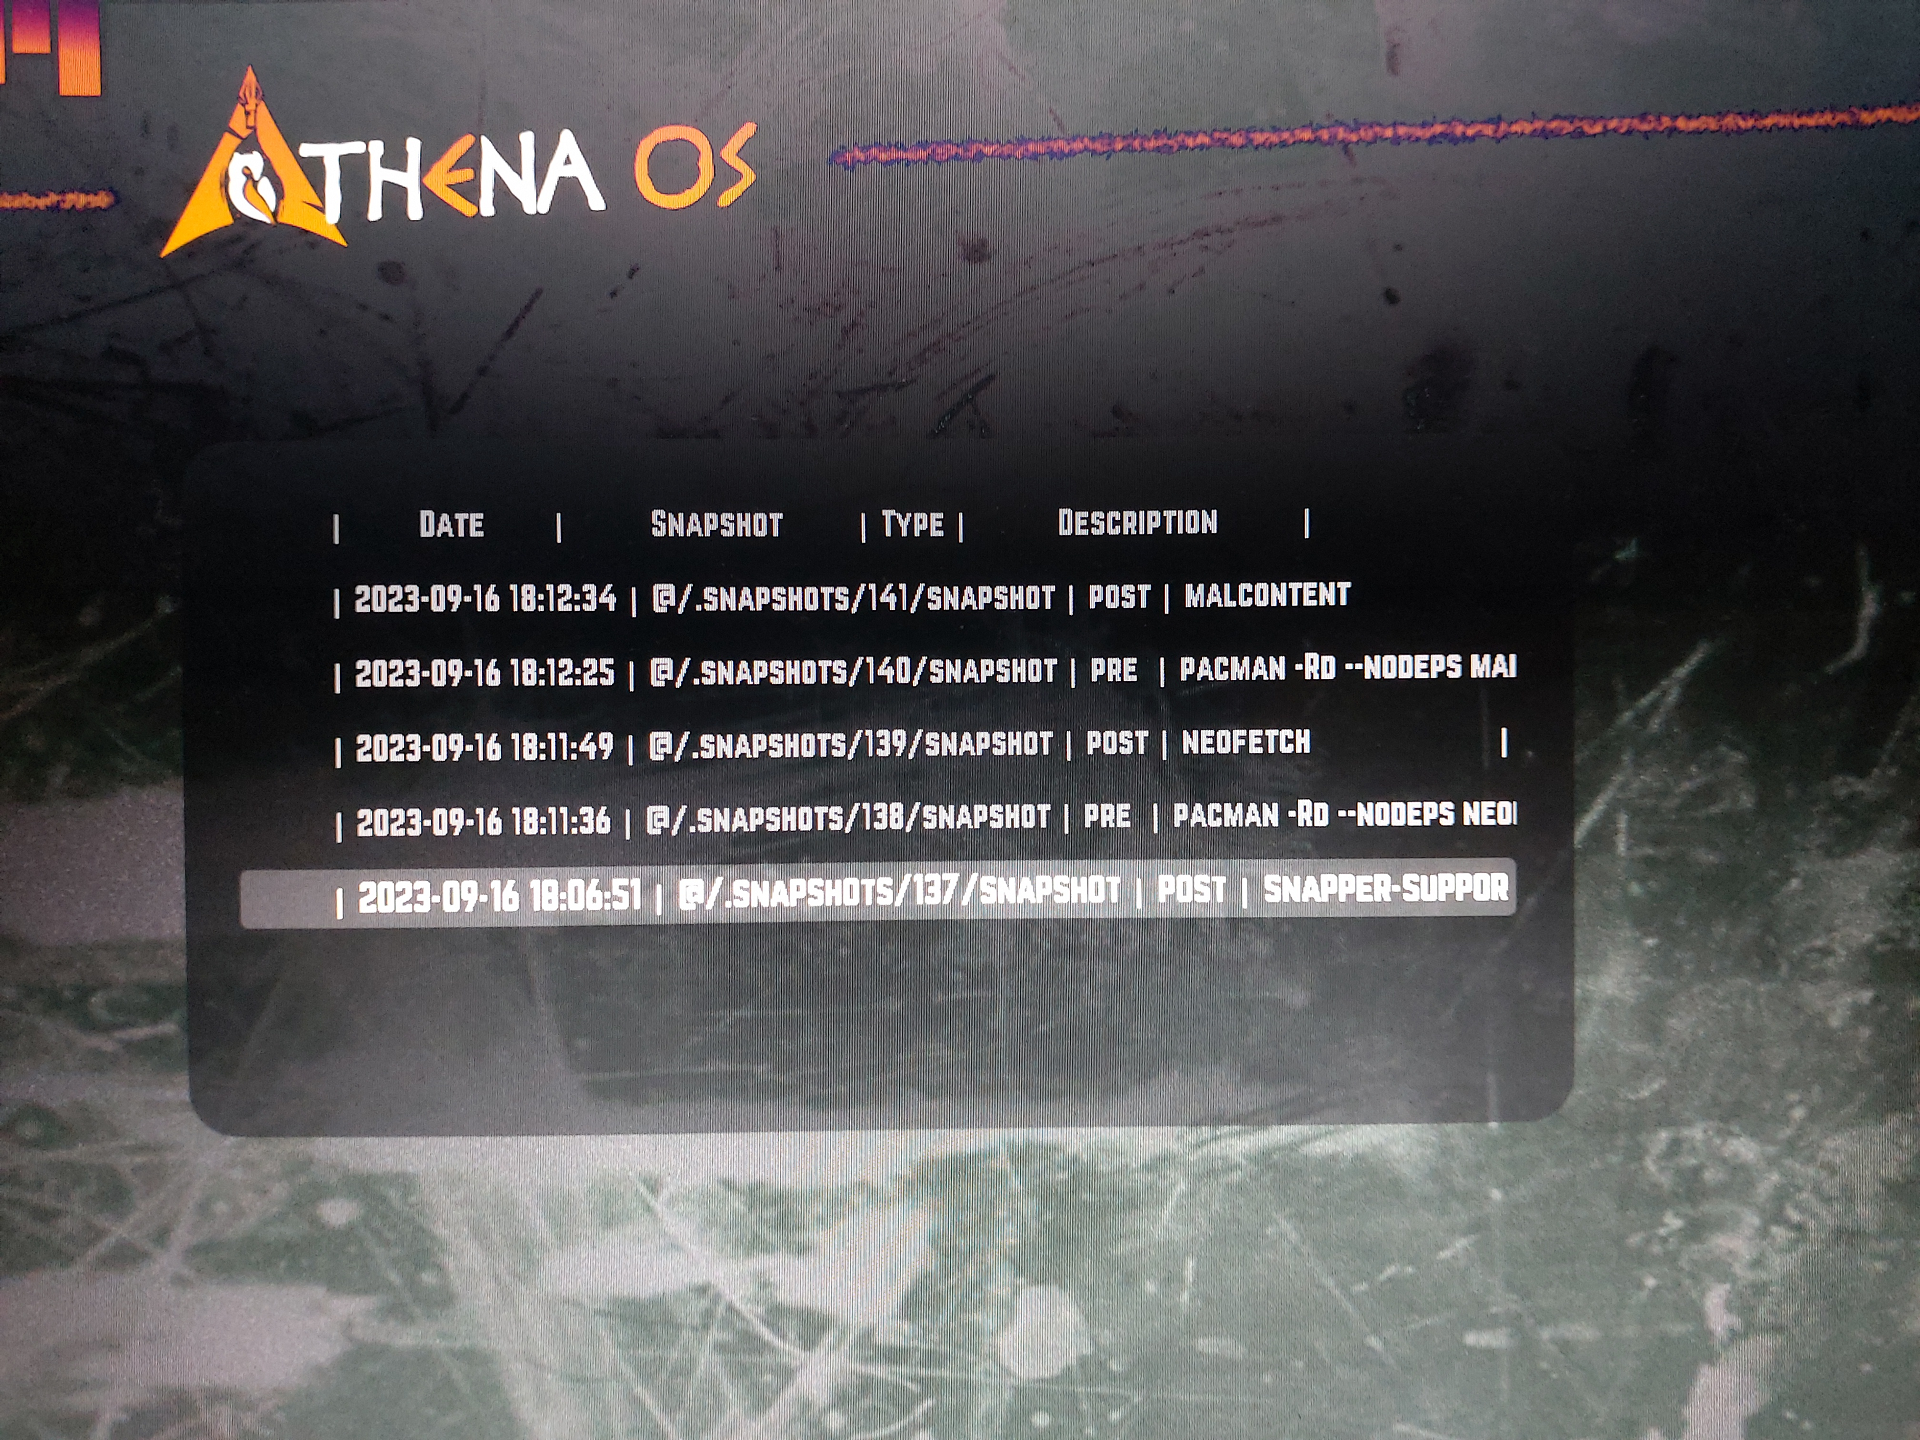
Choose the snapshot you want to restore
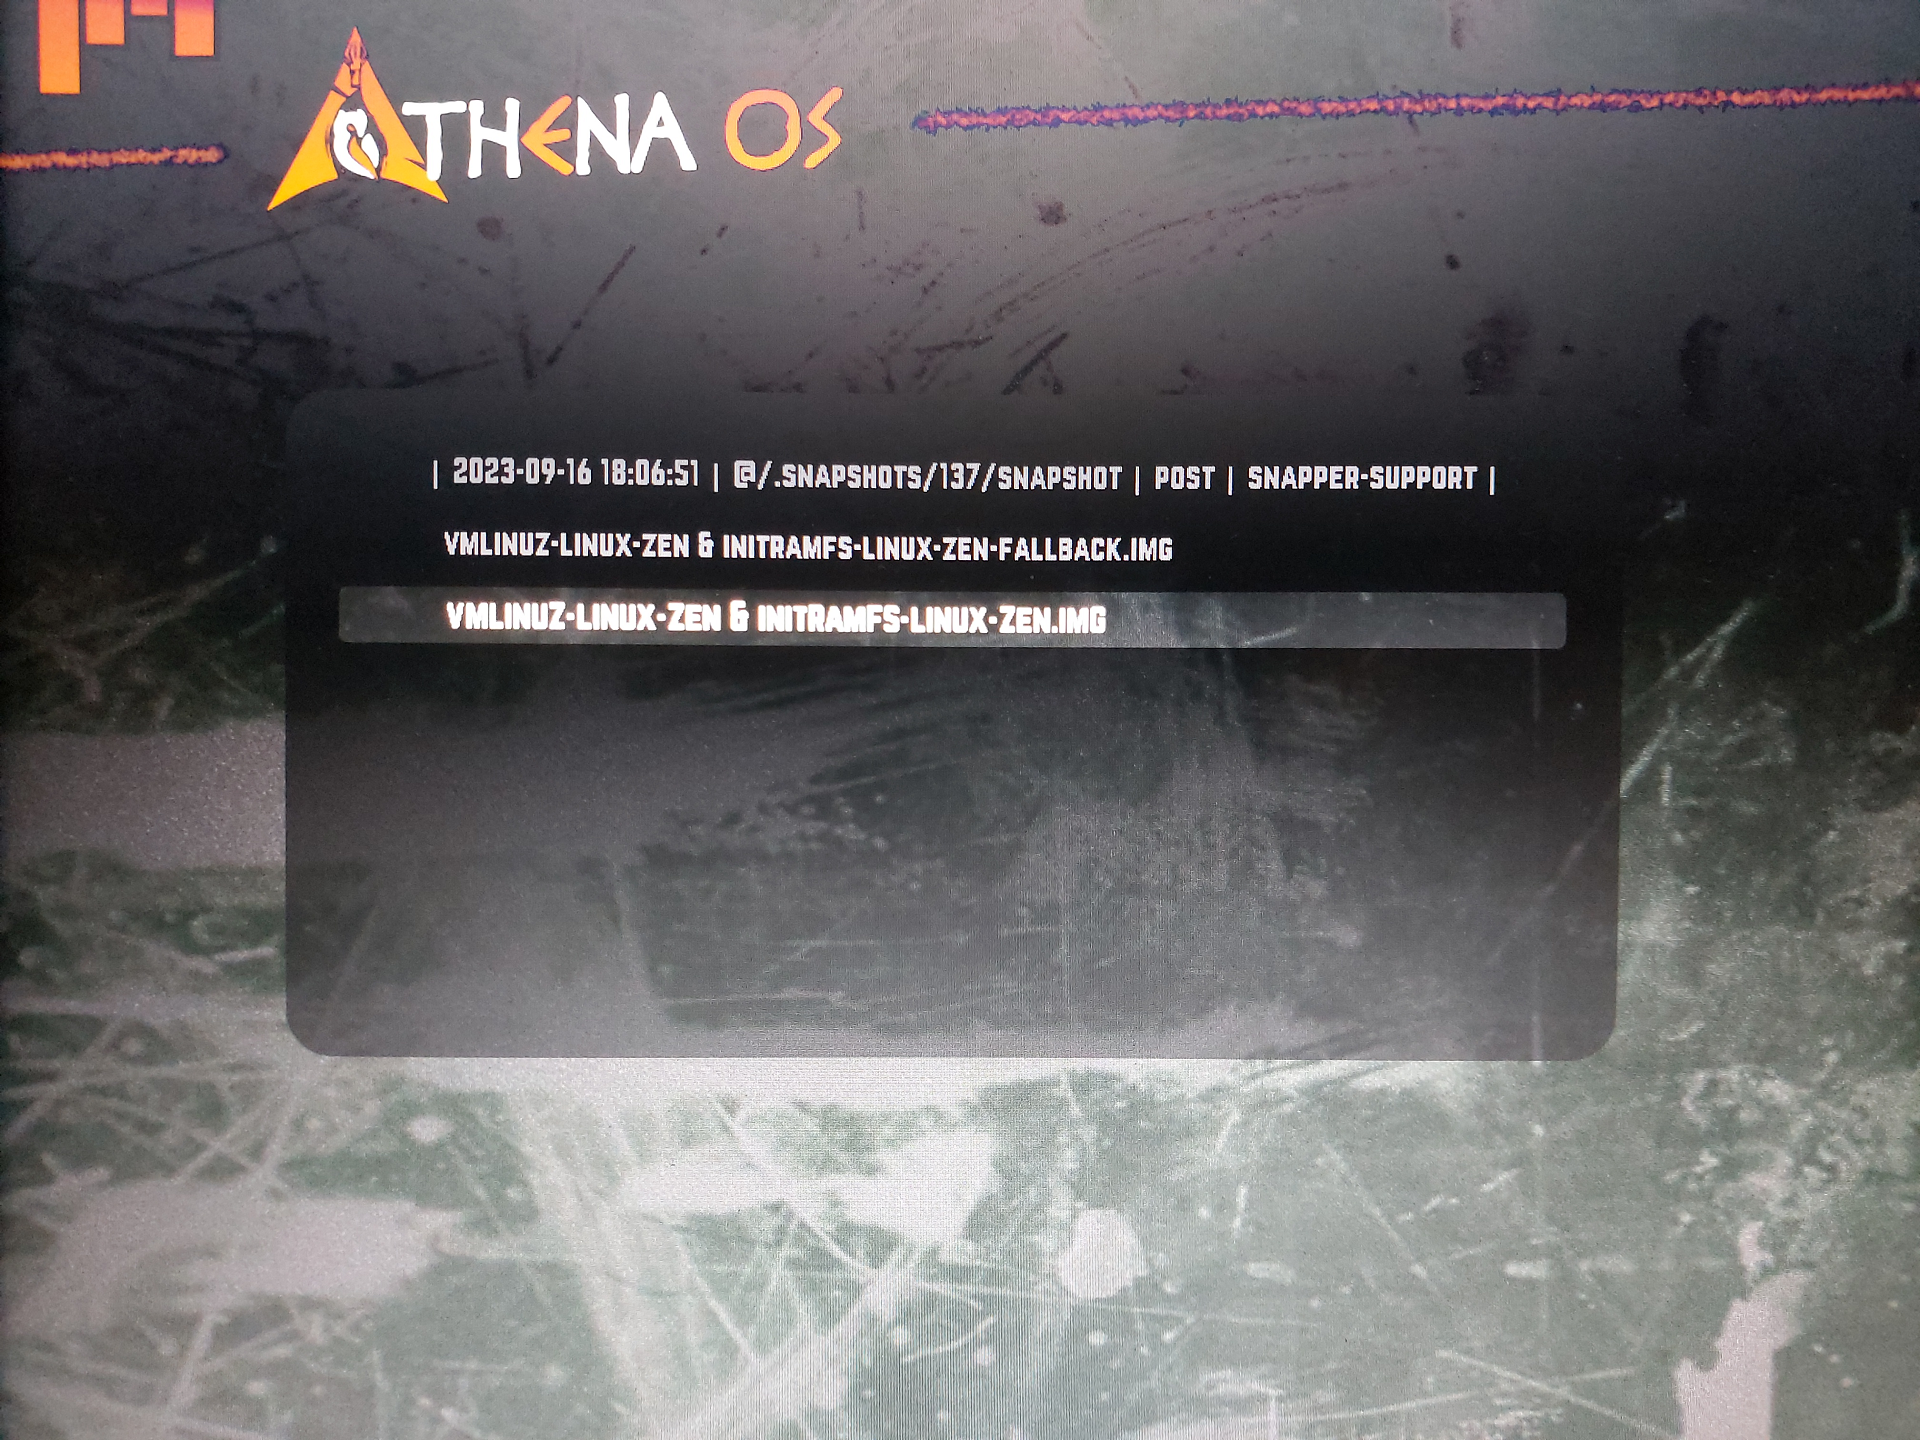
and select the Linux Kernel to run
Cannot store HTB App Token
Section titled “Cannot store HTB App Token”secret-tool hanging
Section titled “secret-tool hanging”When you run htb-toolkit -k set and, by entering your App Token in the Password field secret-tool hangs, try to reboot the system. If it does not work, install Brave browser, open it and at first run a popup window asking for the creation of a new password is shown. You can choose to set a password or just press Enter two times if you don’t want, and finally try again htb-toolkit -k set.
secret-tool: The ‘/org/freedesktop/secrets/collection/login’ object does not exist
Section titled “secret-tool: The ‘/org/freedesktop/secrets/collection/login’ object does not exist”Run:
killall gnome-keyring-daemongnome-keyring-daemon --startit will create the directory $HOME/.local/share/keyrings.
secret-tool: Object does not exist at path “/org/freedesktop/secrets/collection/login”
Section titled “secret-tool: Object does not exist at path “/org/freedesktop/secrets/collection/login””In WSL, it happens because it is not able to prompt the graphical view to add the password to protect the keyring. You can connect by RDP to Athena WSL GUI by kex:
kex --esm --ip -sopen a terminal and run:
codiumIt will open VSCodium that will trigger the keyring password window. Leave blank or choose a password on both the fields and confirm.
Exit from RDP session and now you can store the HTB App Token.
Pentesting tool from menu opening terminal with no output in VirtualBox
Section titled “Pentesting tool from menu opening terminal with no output in VirtualBox”When you search for a pentesting tool, like Nmap, in Application Menu or by Red/Blue Team Menu in GNOME, where the terminal is invoked but with no output, just go to the Virtual Machine settings and disable 3D Acceleration.
Virtual machine freezes randomly after a while in VMware Workstation Pro 17.x
Section titled “Virtual machine freezes randomly after a while in VMware Workstation Pro 17.x”Uninstall VMware Workstation 17 and download from VMware website.
Then, open VMware Workstation, right-click on the virtual machine object -> Manage -> Change Hardware Compatibility… and select Workstation 16.x, on the next window select Alter this virtual machine, apply these changes and run the virtual machine.